

This is the second in a four part series on the basics of working with WordPress to build sites. Last Week, I went over WordPress itself, some of its Pros and Cons, and briefly discussed two similar CMS systems: Joomla and Drupal. This week, I’ll be walking you through the registration and site setup process at wordpress.com
To begin, for the sake of clarification: WordPress.org and WordPress.com are both handled by Automattic, the people behind WordPress. The ‘.org’ site handles general information, the open-source download for the software, and a eStore with some nice WordPress swag. The ‘.com’ site is essentially Automattic’s hosting arm that allows people with little-to-no technical backing to easily set themselves up with a WordPress site.
As a final disclaimer: The information in this post is current and accurate as of the time of its writing. Automattic may make changes to this process, or their rates, at any time that I have no control over and may not know about at the exact moment that they happen.
So, if you head over to wordpress.com, this will be the first thing you see…

You’ll basically hit the relatively big-blue “Create Website” button and you will be greeted with the first of a five-part process that will tend to the specifics of what you want. In the first part, you’ll need to tell WordPress what kind of site you want:
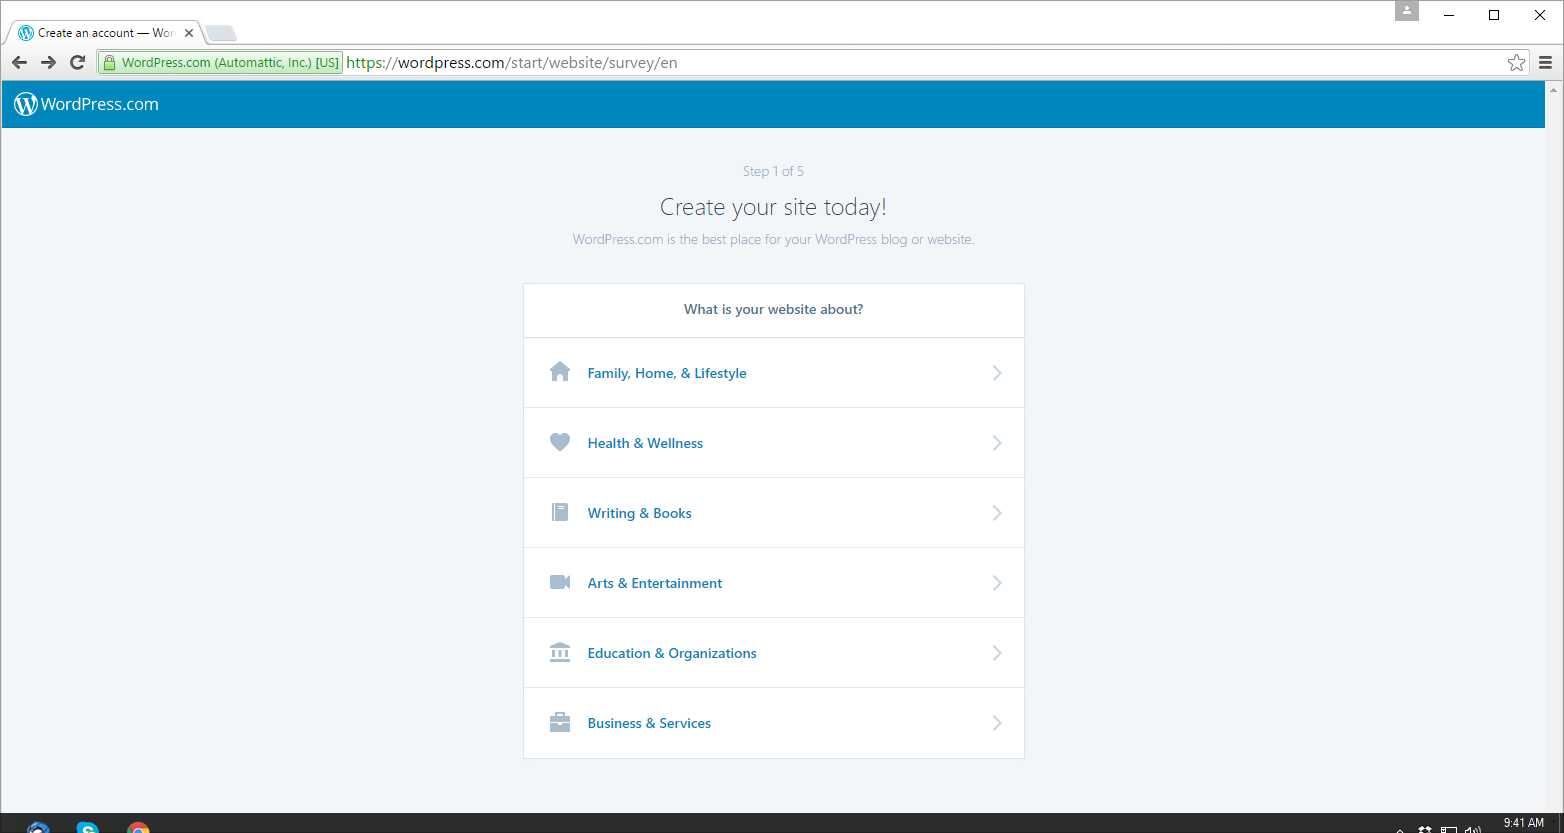
For the sake of this walk-through, I decided to do a simple blog setup so I selected: ‘Writing & Books’. Past that, the site will ask you to be just a little more specific:

From there, I selected ‘General Writing & Books” and the site moves onto part two which will give you some base themes to choose from base on your choices from the past two screens:
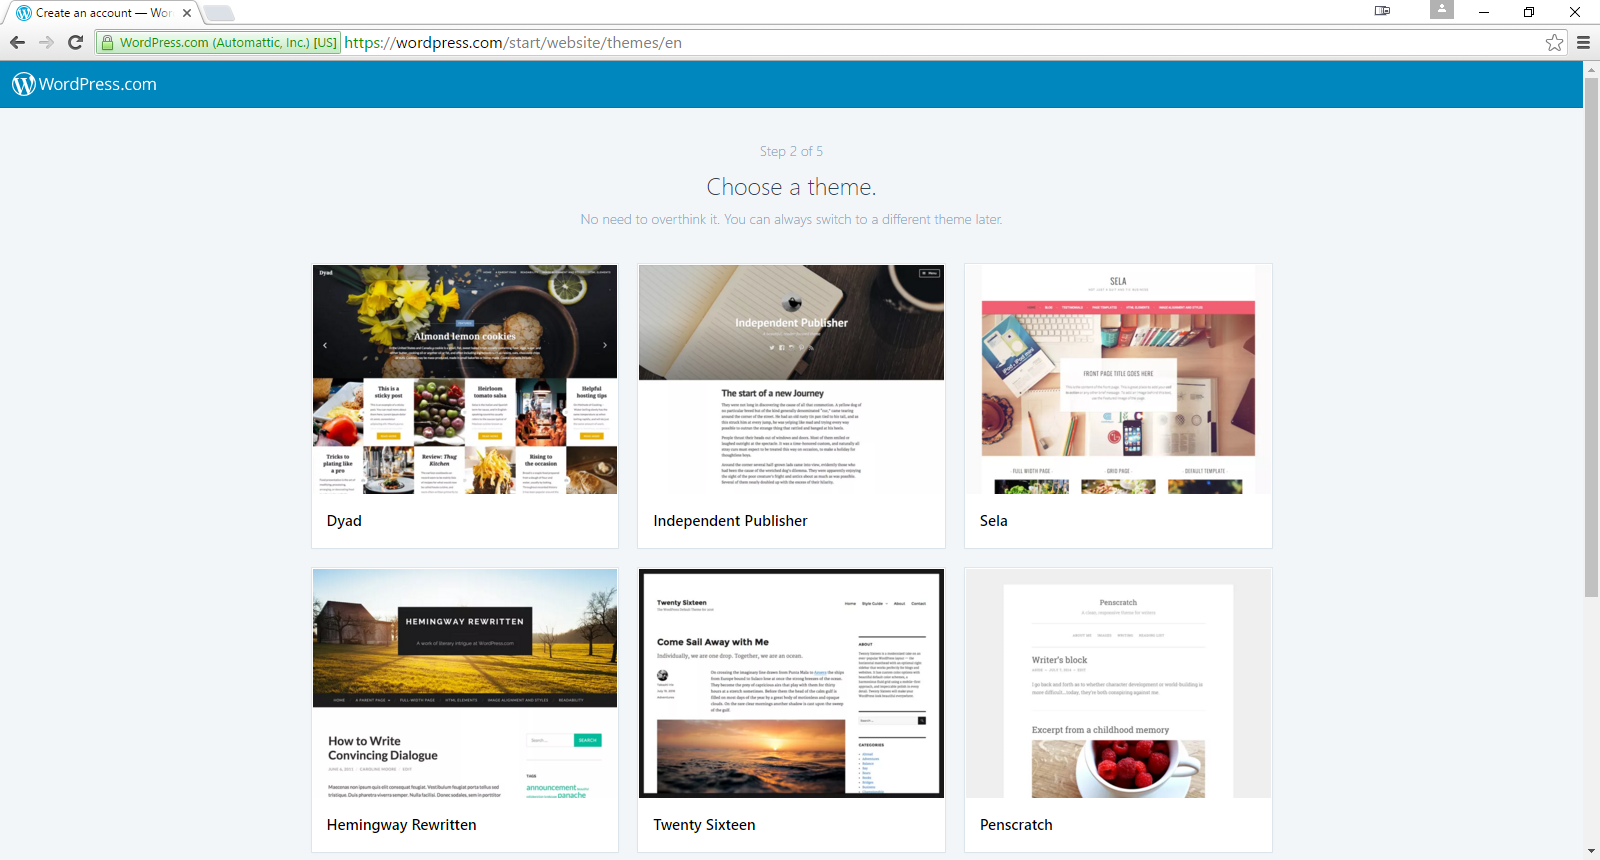
As the tagline at the top says: You need not put too much thought into this as a WordPress theme is something that can be changed fairly easily at a later date, save some potential content formatting and what not. If you really don’t see anything you like, but still want to move on, at the very bottom of the window there is an option to find that reads “Skip For Now”:

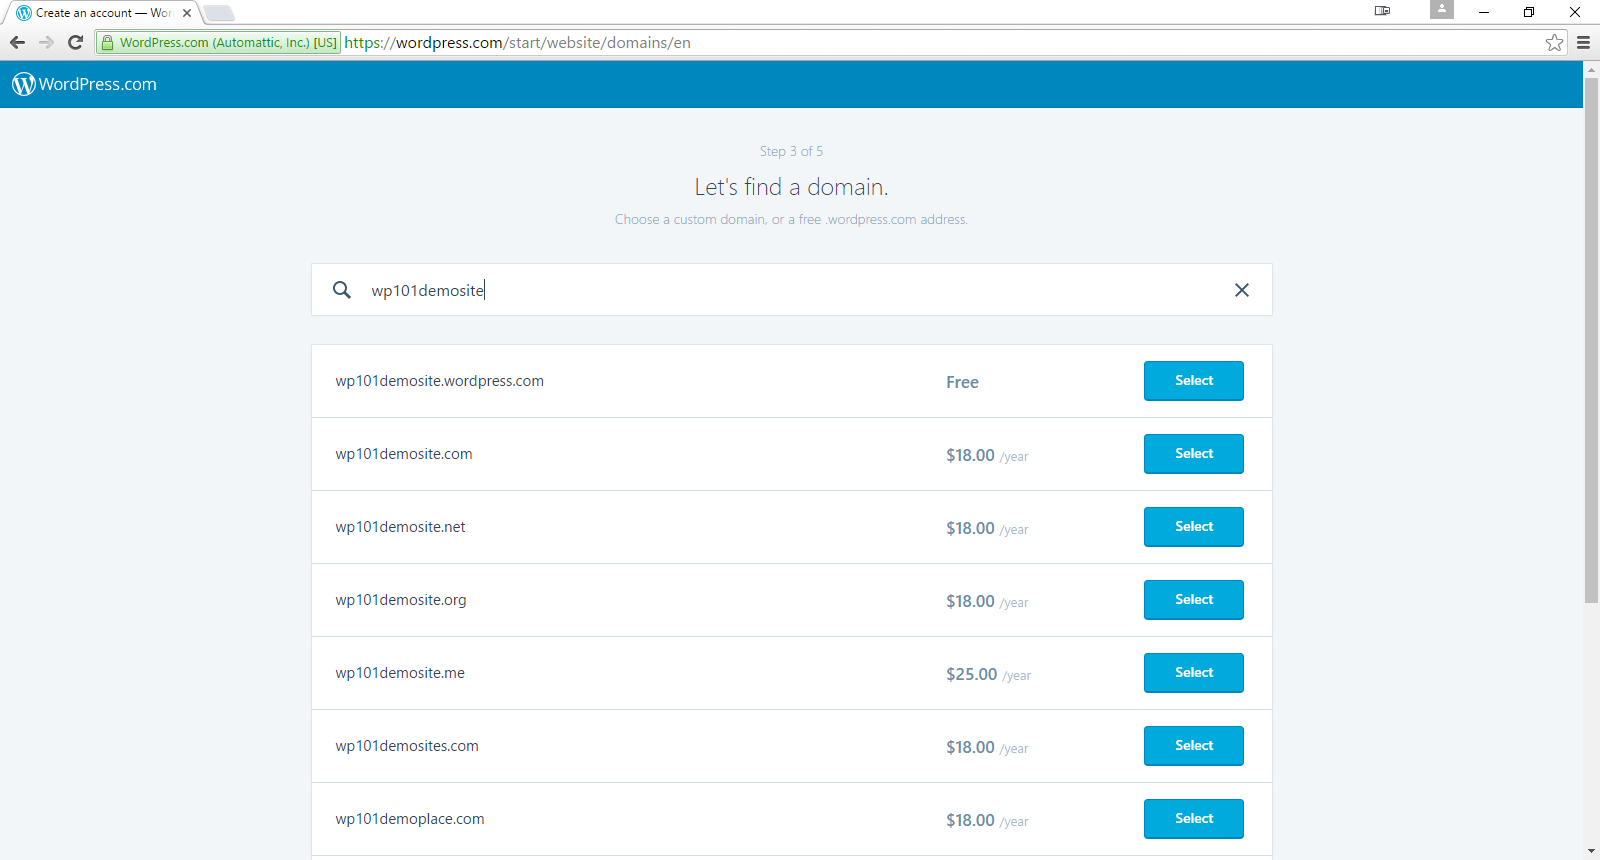
In step three, this is where you will make one of the more higher-stake decision for you site, which will be its address:
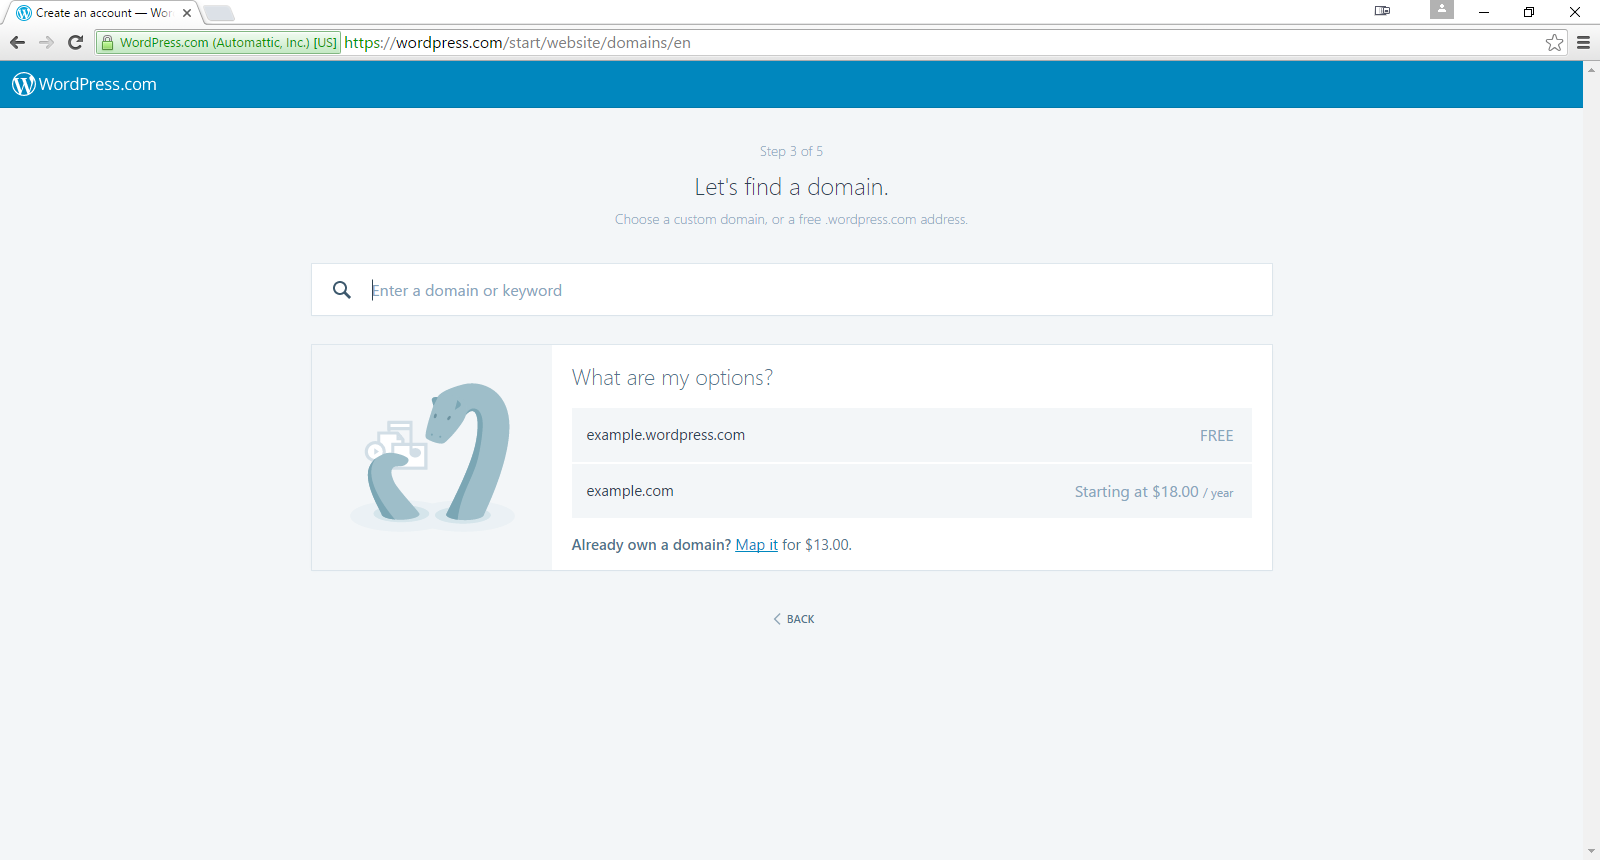
For this part, you will just have to decide on a keyword, or keywords, that will be appended to what will be the rest of your site address,”wordpress.com”. This is something that you should put a bit more thought into as this is something that you won’t be able to change as easily as your site’s theme at a later date. Still, this is not something that is set in stone any more than your theme so if you do have a change of heart about this later, there are ways to begin the process. Yes, it is a bit of a process, but depending on the circumstances it can be more tedious than complex.
Anyways, simply type what you would prefer in the search window, and if your specific choice isn’t available for the free domain, you’ll be shown some alternatives that you can purchase. In this example, my choice of ‘wp101demosite’ was open so I took that:
In part four, you will select the “hosting” plan you want with WordPress.

I’ve never worked with their paid services so there’s nothing I can tell you about that myself, but below is a chart that shows you what you would get at each level:
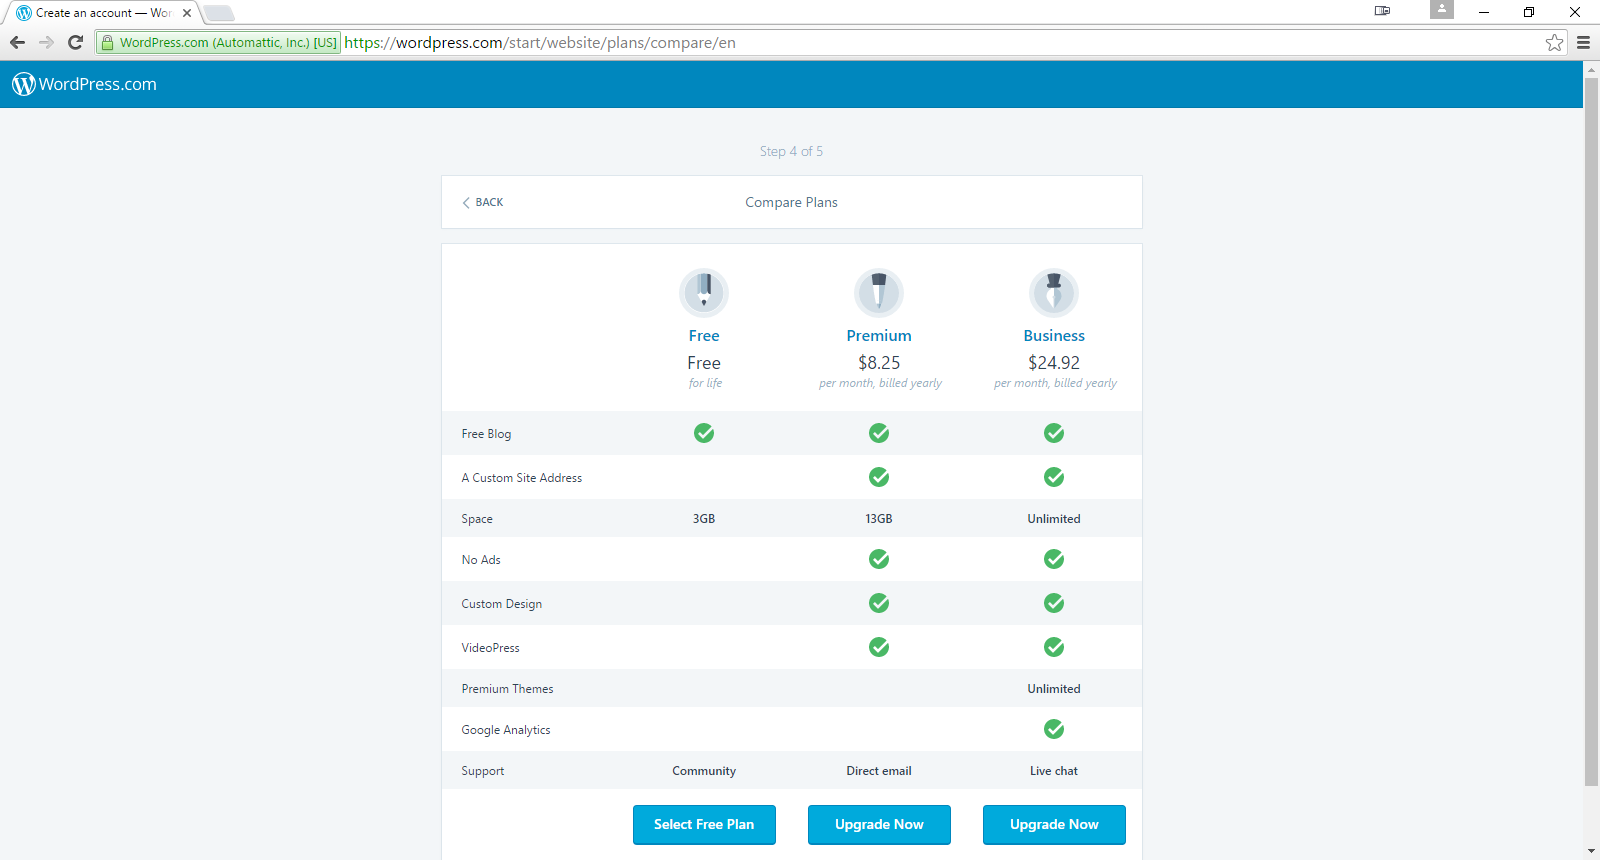
I’ll get into the nitty-gritty of hosting providers and packages in a later post in this series, for now, as the plan is to show you how to get up and running with little-to-no monetary outlay on your part, we’ll take their “Free” plan and thank them for it
Finally, you’ll just have to give them an email address that you would like to use in tandem with your new site and create some login credentials for yourself.

You may have to get a bit creative with the username section, or settle for something less than elegant as a lot of names are taken, but remember that its essentially just a “key” to your site door that likely wont be seen by many so it really doesn’t need to look like much.
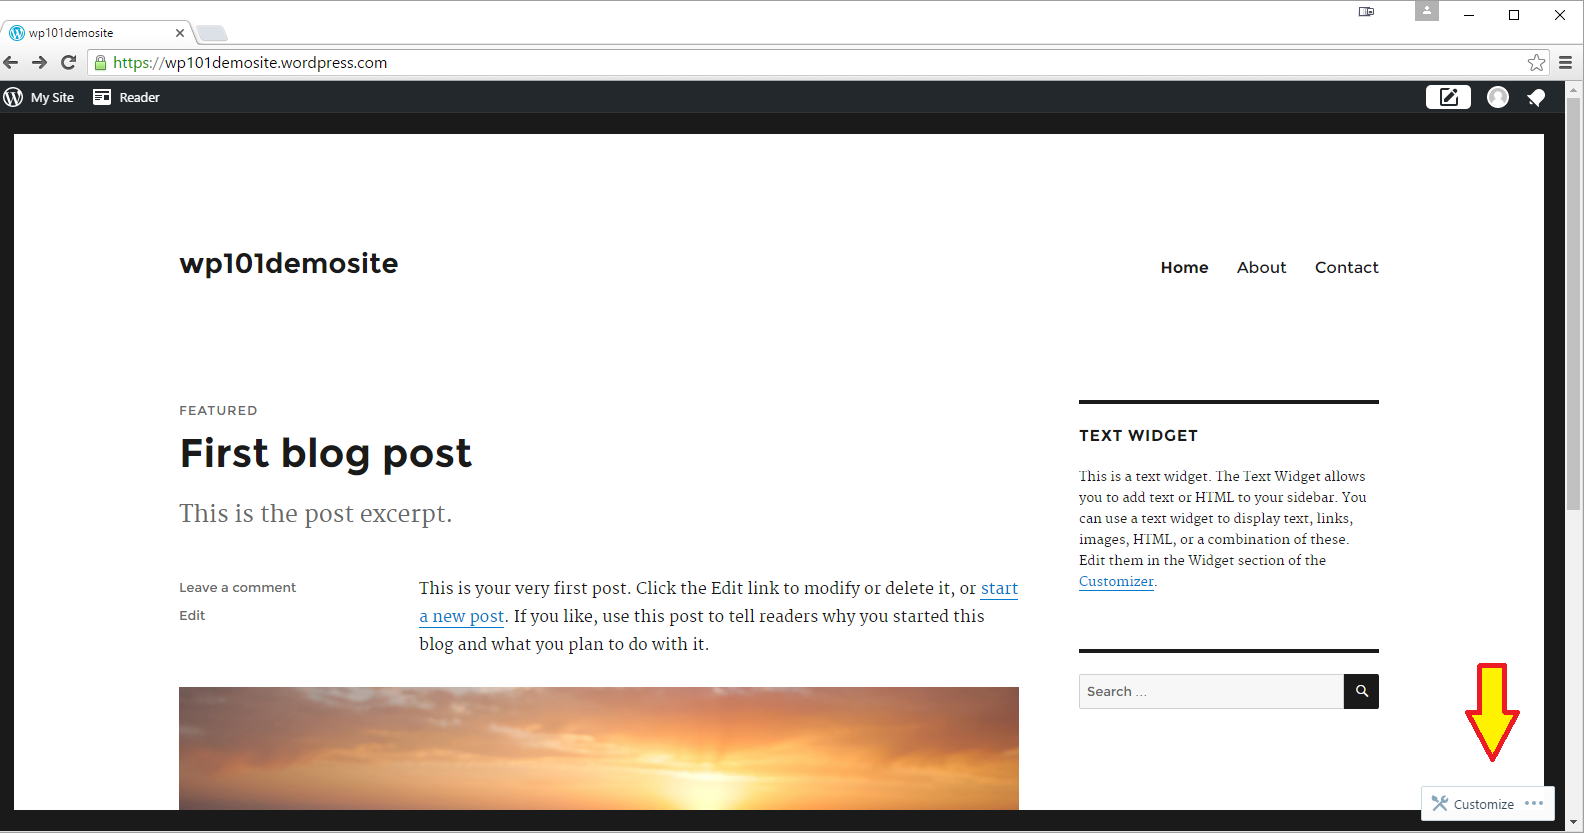
Once you get past all of that, you will be treated to a small, but brief, animation showing the various parts of your site and account being setup, and then if all goes well (and it likely will), you will be greeted with this page:

At this point, your site is live and anyone in the world with its address (in this case: http://wp101demosite.wordpress.com) will be able to bring it up. Likely, at this point your site won’t be anywhere NEAR ready for public viewing, however, so you’ll probably want to keep the address to yourself for a bit while you’re making your tweaks.
As to the matter of making tweaks, you can either click on the “Customize” button next to “Themes” in your site menu or you can use the “Customize” button that will hover in the lower right-hand of your site when your site menu is closed
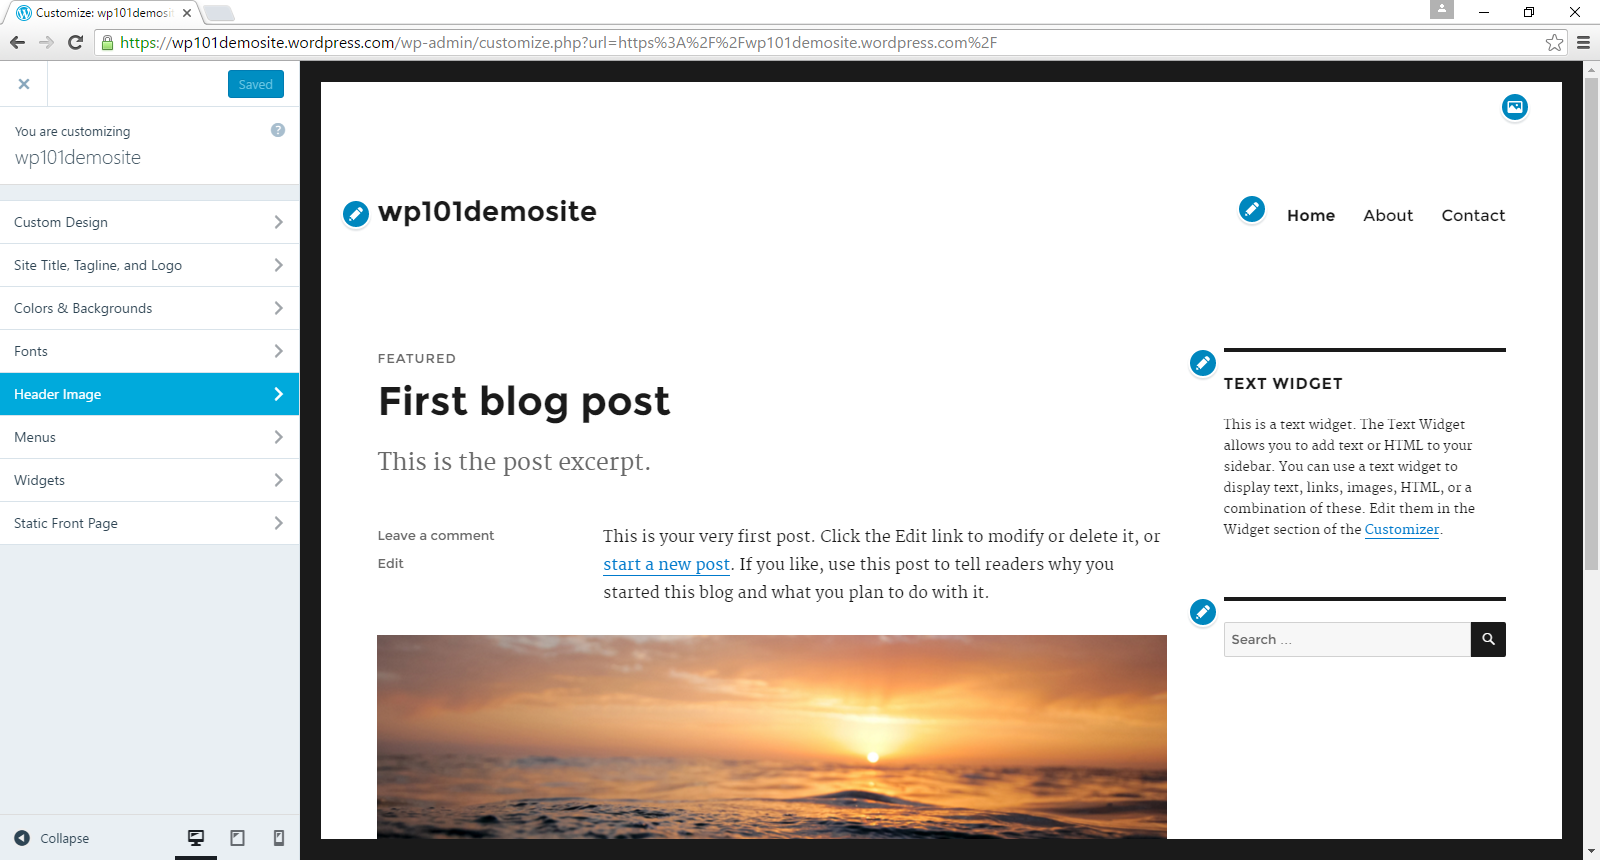
From there, you will be shown the site customization menu where making your changes will be a matter of clicking the blue pencil next to whatever you want to edit and the window on the left will switch to the section you will need to make your changes in
That will wrap things up for this week. Next week, I’ll be taking you away from WordPress itself for a bit to show you what you will need to setup a development environment on a computer or laptop to be able to start experimenting with the raw WordPress CMS itself.